Hi Everyone!! I had heard some rumblings on the message board for cupcake wrappers. For those of you who don't have design Studio and would just prefer to have a Gypsy file~this file is for you!
INSTRUCTIONS ARE FIRST~PICS OF WRAPPER AT END OF POST :)
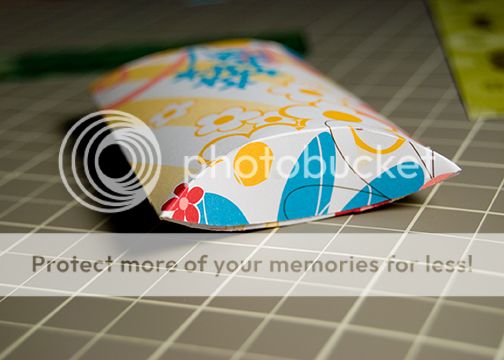
oh okay, just one pic so you know what the heck I'm talking about :)

Once again I wanted to make a file that EVERYONE would be able to use no matter what cartridges you have loaded on your Gypsy. That's right~I did it again....
this file uses only Gypsy Font and Wanderings :)
Okay~onto the details of this project:
This project was designed originally on a 12x24 mat~but you don't need to use one at all!
I selected this size while I was designing, as I liked having more room to move around on the mat. To be honest when I cut it I just used a 12x12 mat and didn't bother changing the mat size on the Gypsy (trust me the Expression didn't know the difference LOL!).
Also
THERE ARE 2 PAGES for this file. You may also end up making a 3rd page~depending on where you want the 2 pieces placed on your mat. I used 2 pages for a very good reason~I promise!
On the FIRST page you have the outer wrapper and the base of the wrapper. If you touch one of those items you will see it's not linked to the other.
I did this specifically to allow you to
BE ABLE TO MOVE THEM AROUND YOUR MAT. When you go to PAGE 2 you will understand why I did this. Here is a pic of page 1 for you. *Note: what is in red is what is on page 1. To get to page 2 just touch on the #1 on your top right hand corner. Click on any picture in this post to make it larger (easier on the eyes).

PAGE 2 shows quite a bit here~don't get worried it all makes sense in the end!
First thing right off the bat is now
BOTH THE WRAPPER AND BASE are GROUPED together. This will allow you to
enlarge or decrease your wrapper TOGETHER. Why did I do this? The answer is (and I found this out the hard way) if you decide after enlarging you want to move it around on the mat~but wait, they are grouped together and you just wanted the one piece. So you decide to push ungroup. Uh oh..... EVERYTHING is ungrouped....all those little pieces....a nightmare to weld!! So this is why I grouped them~easy enlarging or shrinking.
One more thing~How do I know what size I have and what should I use?
Measure the bottom of a muffin cup, the diameter across the circle should tell you what the height for your circle needs to be. In this one it is 2.16"H. After you've enlarged your wrapper and you want to see just how large it will be: Just touch 1x on your base wrapper (this will highlight to blue), then TAP ONE MORE TIME on the middle circle (turning it PURPLE) and voila! You will see the dimensions of your base diameter. I've highlighted these important details in the aqua circles.


So, if you're like me and you want to move stuff around to save paper.....
DO ALL YOUR ARRANGING ON PAGE 1. Once you have it arranged the way you want it, GROUP BOTH items. Keeping these 2 pieces highlighted in BLUE touch the + (plus) button on the top left of your screen. This will bring you to PAGE 3. Now just touch the COPY button located under the ADVANCED tab (top right hand of your screen). It is the 2 little purple squares that are beside the eye button. After you touch the copy button your image from PAGE 1 is copied to page 3 (all nicely arranged the way you want it to save paper!).
On page 3 feel free to enlarge or decrease the wrapper to your project's requirements.
When you are ready to cut just make sure you are on page 3 and you are all set!! Now, if during all of this you make a mistake~just exit out and DON'T save. Open it up and just try again :)
Any questions AT ALL please leave me a note~I read each and every single comment. Just be sure to leave me a way to contact you :)
I hope you all enjoy this one~I had a great time designing it!!


 *This knocks another cartridge off my list that I was going to buy just for 1 cut LOL!*
Click HERE for the file - but please leave a thank you before you leave :)

Video, Images and Artistic Works by Myamagoo of Design~Create~Inspire is licensed under a Creative Commons Attribution-Noncommercial-No Derivative Works 3.0 Unported License.
Permissions beyond the scope of this license may be available at http://www.cricutinspiration.blogspot.com.